Ask a Rigger
What Inspections Should I Perform on My Kill-Line Pilot Chute?
One of the most active parts of a main-parachute system is the collapsible-pilot-chute system. They came about in the 1980s to make the pilot chute deflate the instant it finishes its job of deploying the lines and main parachute. Collapsible pilot chutes smooth out the opening process, reduce stress on the critical center cell of the canopy and allow you to fly around unimpeded by a trailing, inflated pilot chute.
The tradeoff is that collapsible pilot chutes experience a lot of wear. In an abrupt and violent instant, the outer pilot chute bridle (the black part you can see) zooms up an internal bridle (“kill line”) that you can see only in certain places along the way. The travel, about the length of your forearm, produces enough friction and heat to abrade both the inner and outer bridles. Most damage occurs between the closing pin and the main canopy (and a similar area for pull-out pilot chutes), especially at the interface with the deployment bag. Additionally, the kill line shrinks a little with every jump, while the outer bridle remains the same length or even stretches a bit.
The wear on a collapsible pilot chute will creep up on you, and it requires an alert and trained eye to detect. They require periodic inspection at least every 100 jumps. Why?
- If the inner bridle fails, you get a full pilot chute that doesn’t collapse. Not ideal, but not the worst case.
- If the inner bridle shrinks too much, you can get pilot chute hesitations; lazy, slow deployments that invite line twists; and even an open-container pilot chute in tow. Yowzzir!
- If the outer bridle fails, you risk an open container with a completely collapsed pilot chute trying to deploy your parachute. Double yowzzir!
Depending on the design, the damage to the outer bridle occurs in diferent places. If you look inside your deployment bag and see a piece of black “limiter” tape and a length of white kill line, carefully inspect the area where the kill line enters the outer bridle through the grommet on the top of your D-bag. Sometimes it’s reinforced with Kevlar that also can get damaged.
KL_wear_1.jpg)
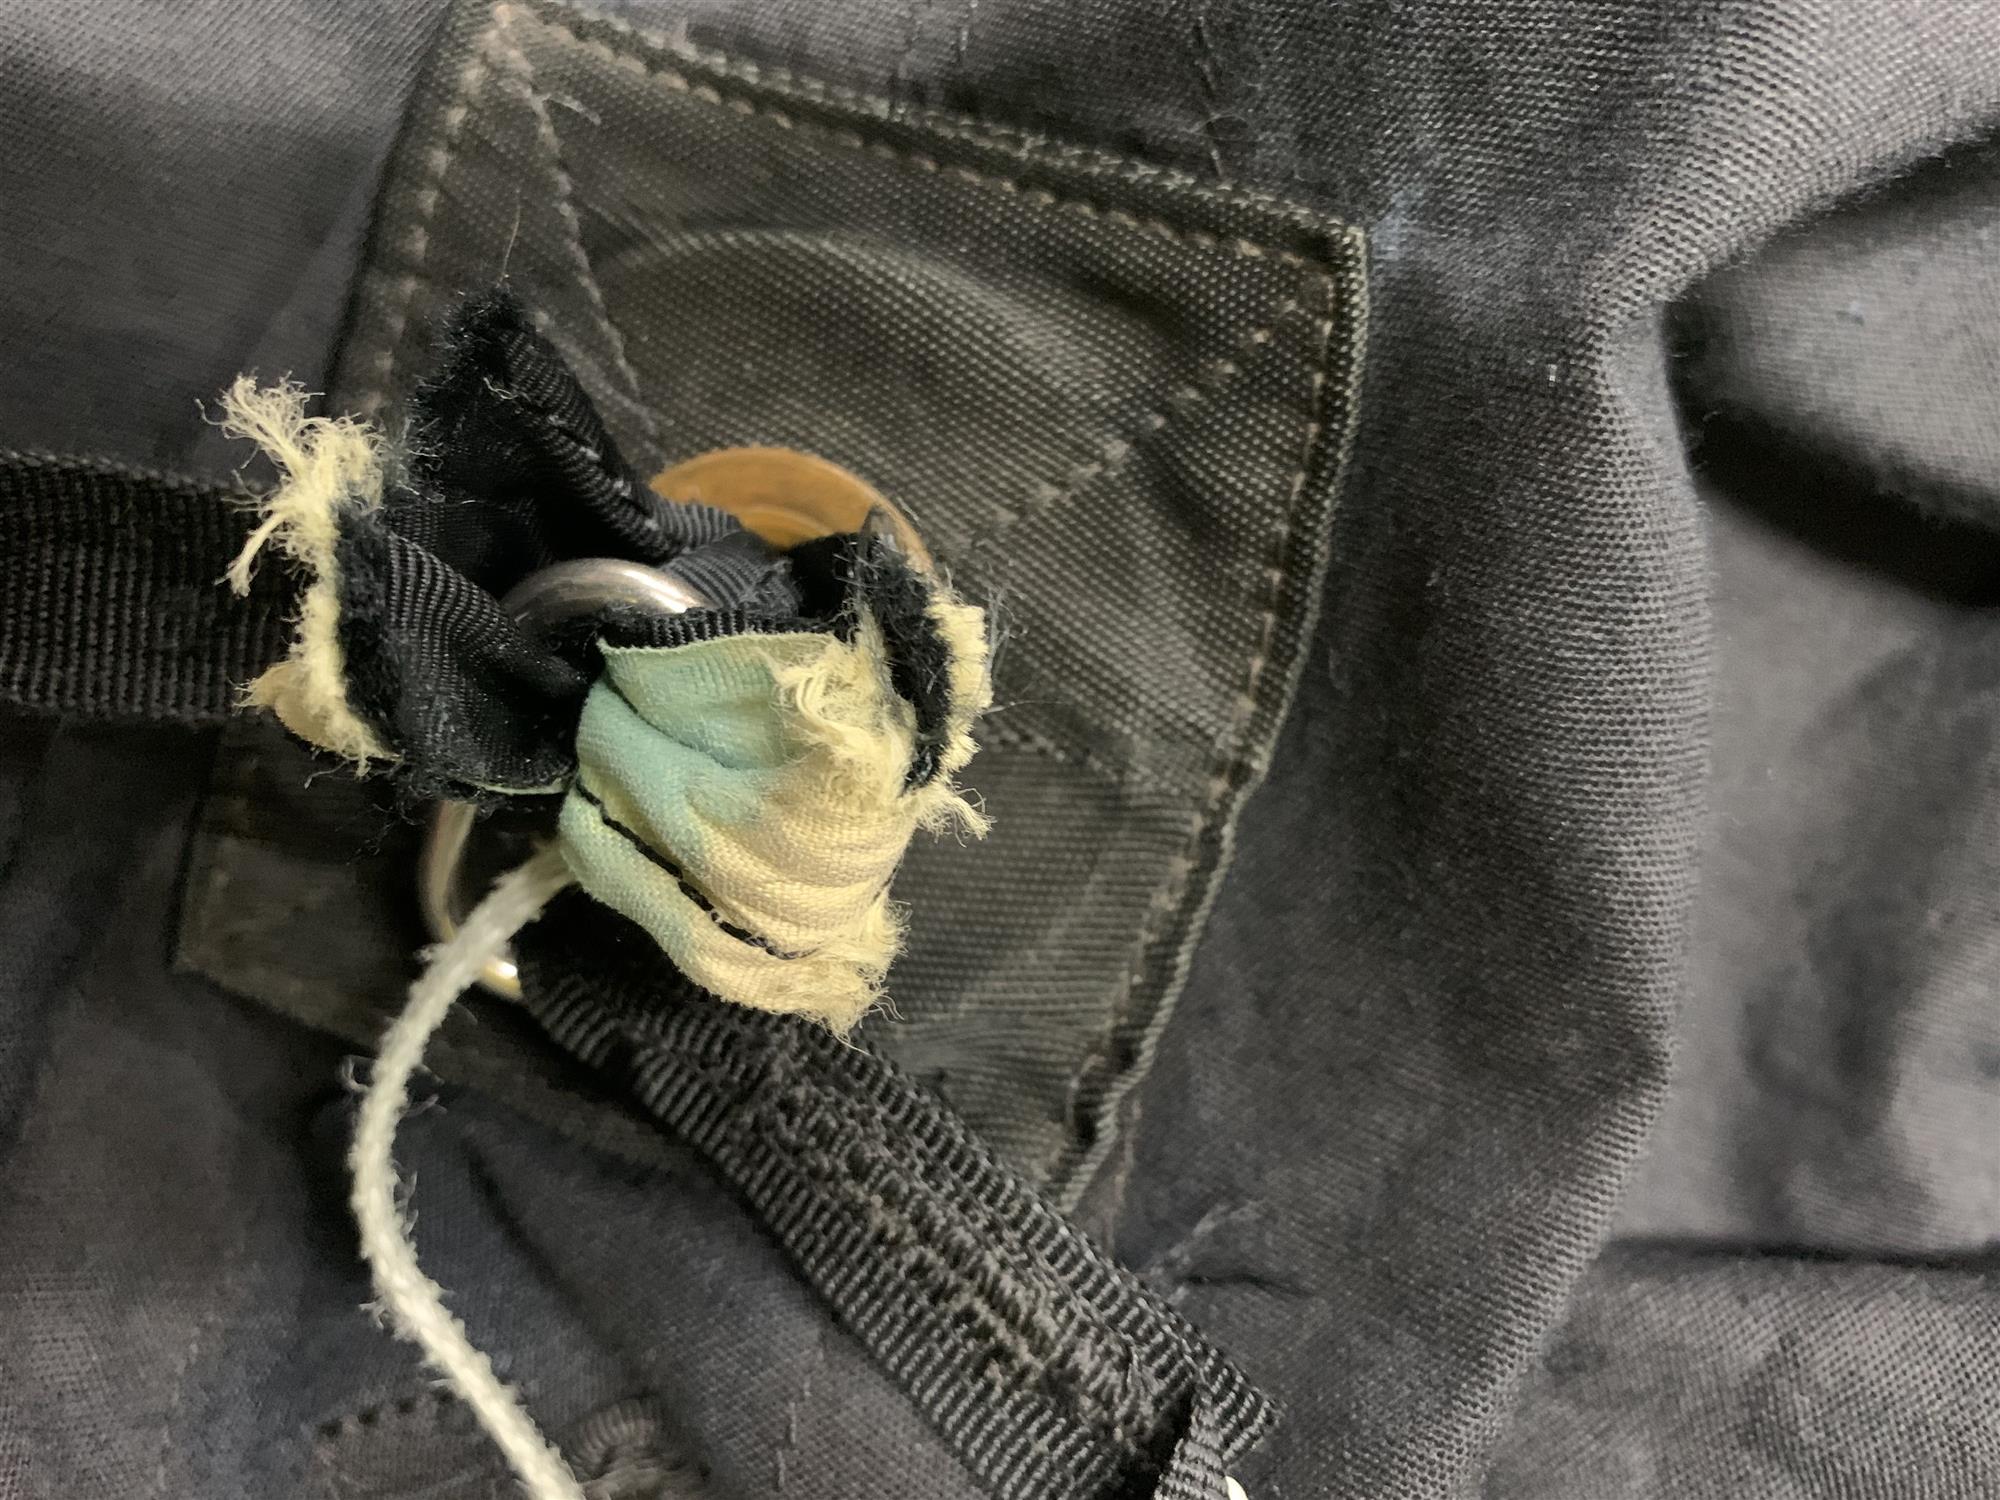
This scrunchy-style kill-line system shows where the kill line has rubbed its way through both sides of the surrounding bridle. It is in imminent danger of failure and could result in a container-open, collapsed-pilot-chute-in-tow malfunction or at least a very lazy deployment.
This limiter-line type collapsible system has suffered enough wear just inside the deployment bag (where the kill line enters the outer bridle) to require replacing the pilot chute and bridle assembly.
If you find significant abrasion, it’s likely time for a new pilot chute and bridle assembly. Repairs are generally not practical. If only the limiter tape shows damage, a rigger can generally scab in a reinforcement but must keep it the same length.
Pull the kill line out all the way to the colored area for the inspection window to see how much wear there is on the kill line. It’s pretty easy to see when it’s about to go.
On scrunchy systems, the outer bridle compresses like an accordion between the deployment bag and pilot-chute attachment on top of the canopy. The scrunching action itself can eventually wear through the outer bridle. Extend the bridle fully (with the pilot chute collapsed) and look carefully along the length of the scrunchy area. To inspect the kill line, you may need to dig it out with a packing tool from both the inspection window and where the inner and outer bridle join at the end of the bridle opposite the pilot chute. Make sure to inspect the entire length between those two points.
After determining that the system looks intact, check the length of your inner bridle with the pilot chute set. The inner bridle can be too short or too long. If you can slide the outer bridle along the inner bridle under tension, the inner bridle needs to be lengthened or replaced. Do that right away before the pilot chute loses the authority it needs to get things off your back and above you.
Does your bridle often twist up like a candy cane? That’s evidence of an inner bridle that’s too long. It also means your pilot chute isn’t collapsing as much as it can. Not only will you drag your partially inflated pilot chute behind you, reducing landing performance, but fixing it will likely eliminate a spike in your opening you thought was just part of the deal.
The correct relationship between the inner and outer bridle is about two centimeters or ¾- to 7/8-inch slack in the inner bridle once the pilot chute is firmly set and the tension released. Look through the mesh of the pilot chute, and you should see just a hint of an “S” in the inner bridle. It may take your rigger a few tries to get it just right, but it’s important.
Collapsibles have really improved what our canopies can do for us, but not without a price. Inspecting your pilot chute regularly is part of that bargain.
Kevin Gibson | D-6943
FAA-Designated Parachute Rigger Examiner
Rahlmo’s Rigging at Skydive Orange in Virginia