Ask a Rigger | How Do I Know What to Look for When Inspecting My Gear?
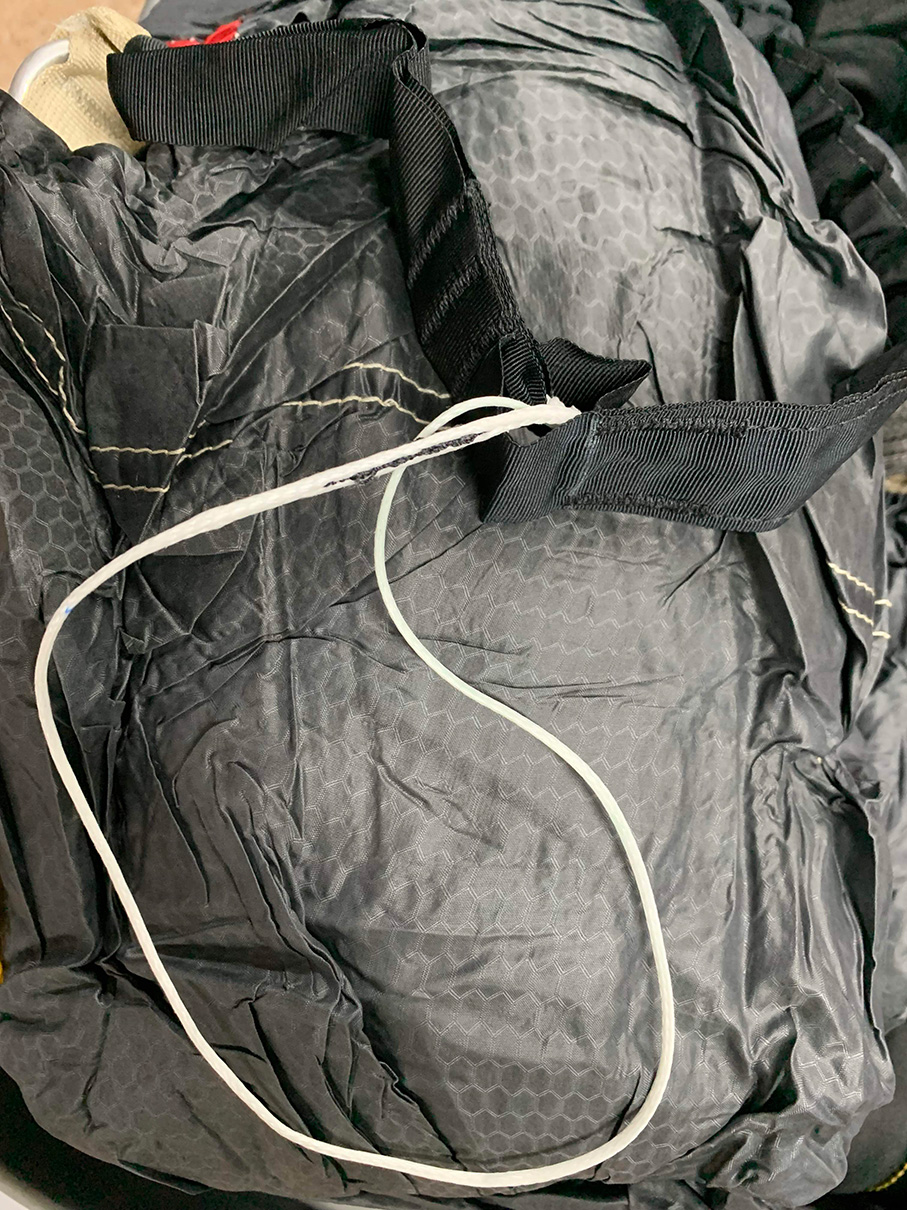
Above: A jumper happened to discover this reserve-closing-loop damage when turning his rig in for a routine repack at the end of a weekend of jumping.
With the afternoon shadows growing longer and the weekend’s frolic and mirth behind you, it’s awfully tempting to just find the nearest active cooler and celebrate. But how about taking a few more minutes to peek at a few key items on your parachute? It could save you time and maybe something even more valuable on your next trip to the DZ.
No need to make it up or do it by heart. In February 2019, the Parachute Industry Association published its Technical Standard 105, “Main Canopy Assembly Inspection Guidelines for the Sport Parachutist, Version 0.” Maybe “Sunday Night Special” would make good shorthand for what is actually a much more cursory inspection than its title implies. The entire 25-page procedure (with lots of color illustrations) can be executed between when the sunset load exits and lands.
Like a pin check, it follows a logical top-to-bottom sequence. Once you’ve been through it a few times, you can even do it justice as part of your last pack job for the weekend. And that would be the best time to do it. Say you run across something. Your rigger then gets a week to put your baby back together in airworthy condition for the next weekend instead of having you plead, “Can you get it ready in time for load three?” on Saturday morning. And it’s a much better time to refresh your closing loop and stow bands, rather than when you’re on a turn load next weekend. And while you’re at it, check that your reserve will still be in date by then.

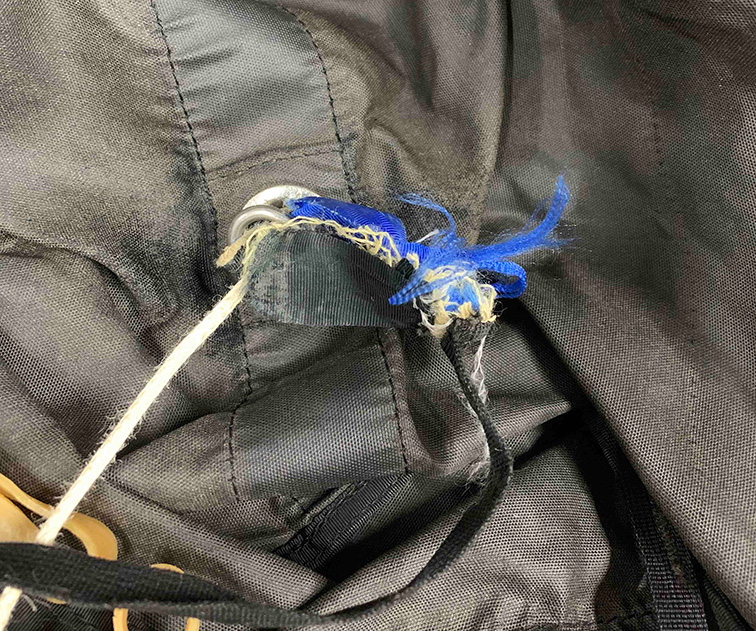
Some kill lines are harder to dig out and inspect.

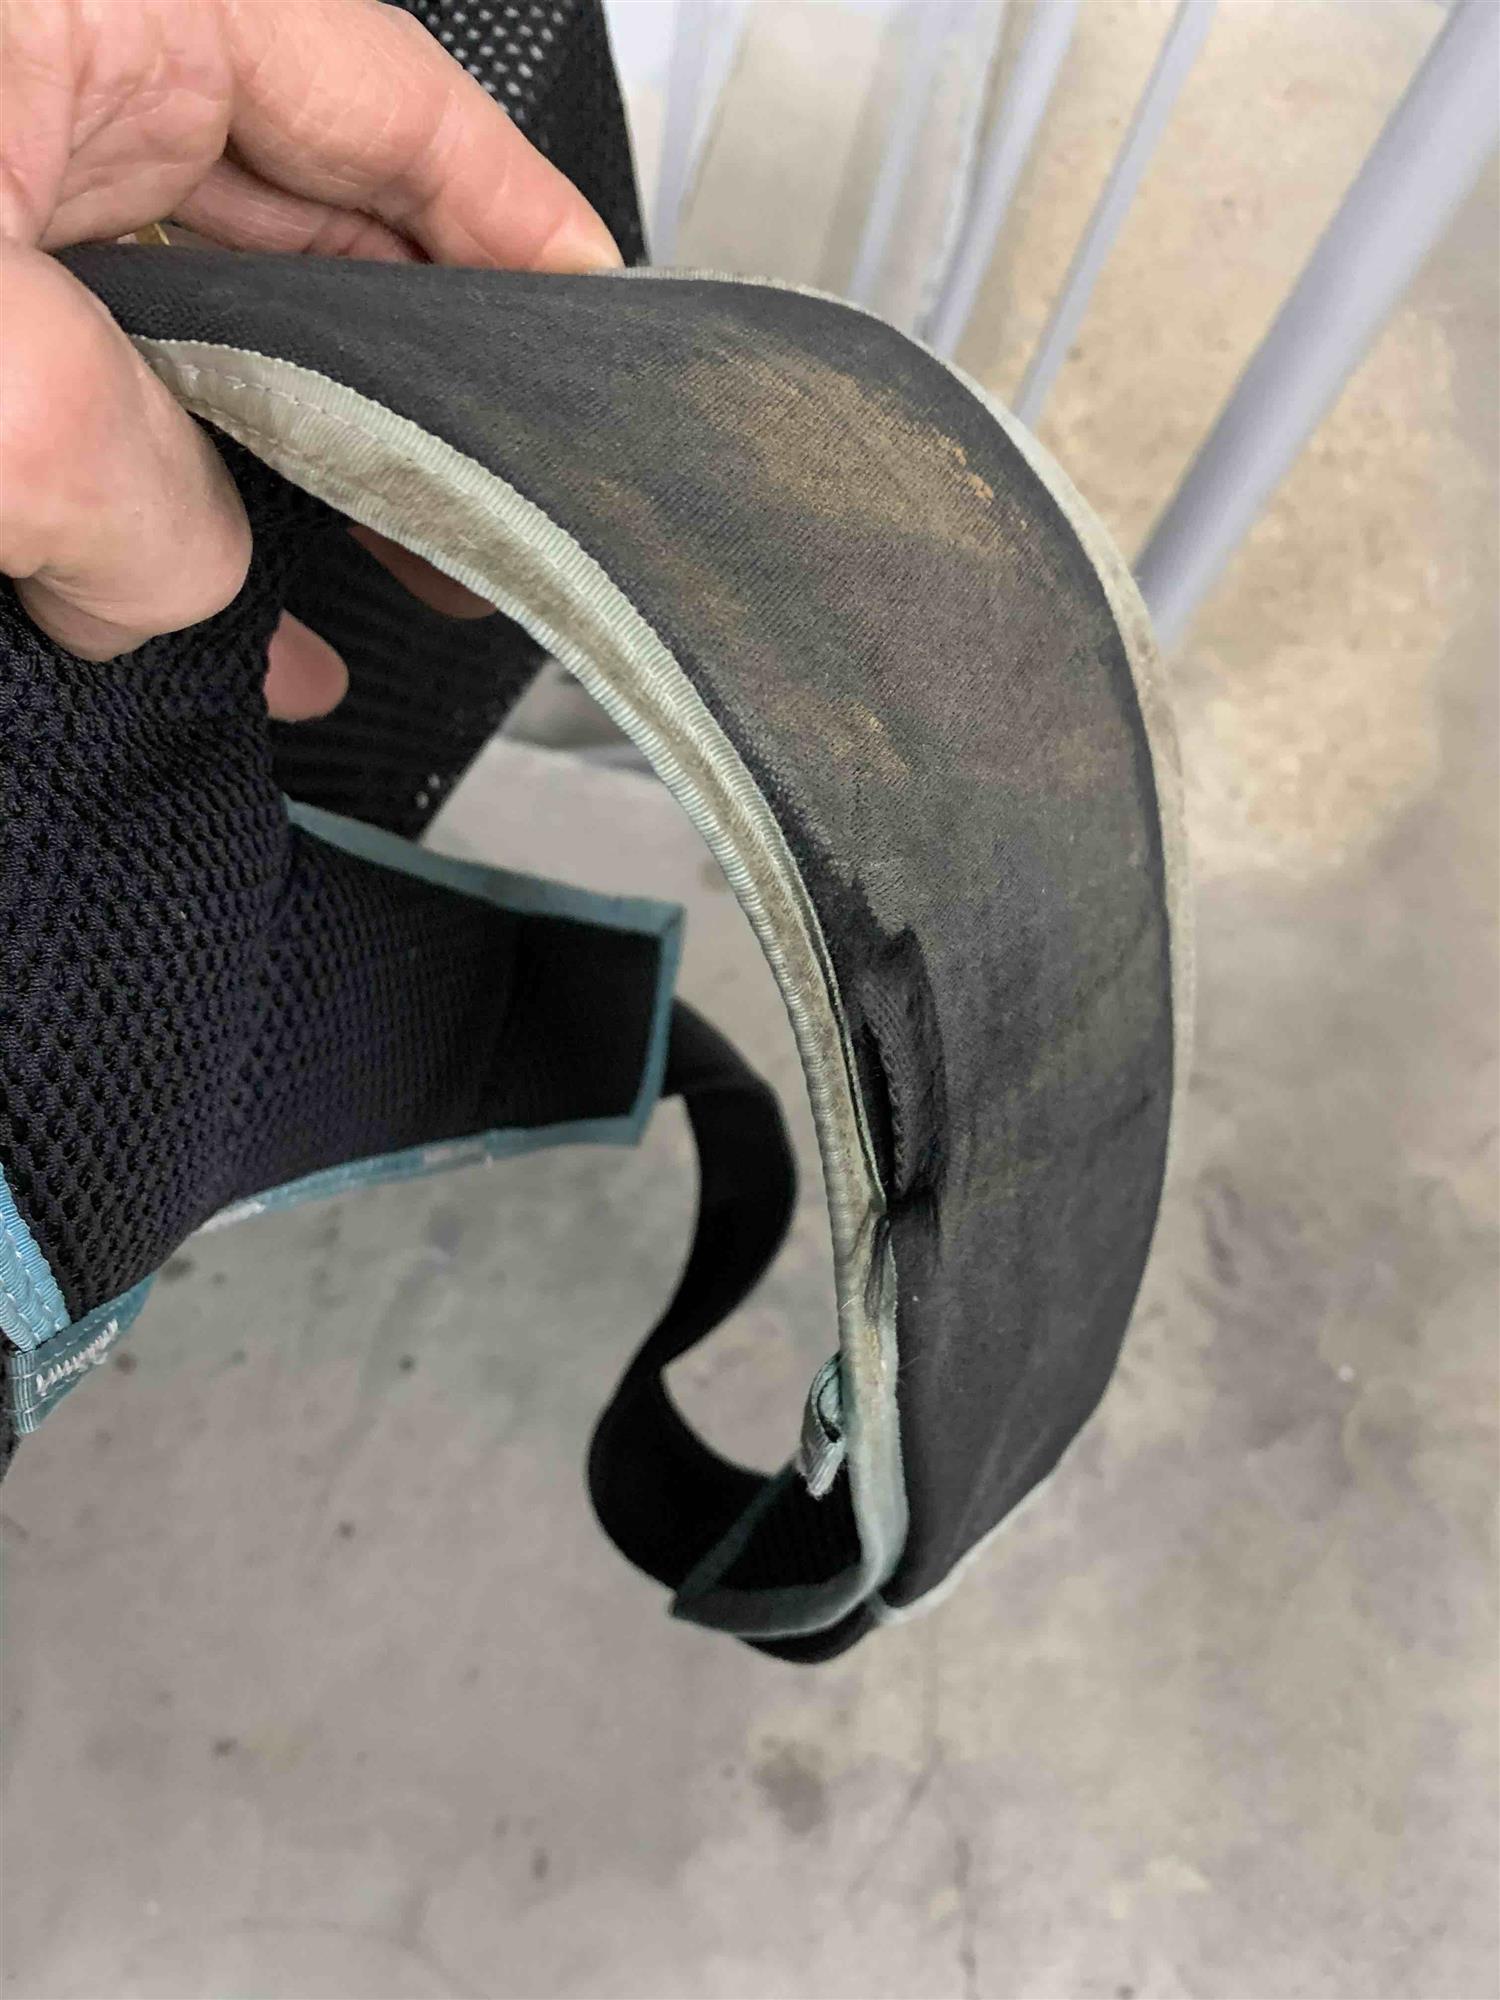
A slide-in landing wore through this leg pad and almost damaged the leg strap. The damage was discovered at the end of the weekend and repaired for the following.
Key items to look for include anything in close proximity to scratches and bruises you yourself collected over the weekend. Make sure you haven’t ground through or bent anything important when sliding in on that downwinder, nosing your canopy over into the sticker bushes, bouncing off the back edge of the door on exit or enduring that slammer you got after packing in a hurry. Untwist your brake lines. Check all your lines closely for wear in the places where they make turns around connector links and brake-setting loops and rings. Check your slider for burns, loose stitches or strains. Sliders and brake systems are really important.
Pay close attention to any place where things rub, like anything to do with the collapsible pilot chute and deployment-bag interface, 3-ring contact areas—especially the white loop—brake-system toggle-keeper pockets, brake lines, brake-stowage loops and elastics. And grab some new elastics for your harness from the gear store to relieve those weak ones of duty. Loose straps flying around in freefall can become more than a scary distraction.
One place “Sunday Night Special v.0” comes up short is on kill-line systems. So, take a close look at where the kill line enters the bridle, either at the grommet inside on top of the D-bag or fish it out from either the inspection window or the base of the bridle. Check that you have a little slack in the kill line once you cock the pilot chute. You may need a rigger or knowledgeable packer to help with this area.
“Special v.0” includes the really helpful line-wear comparison pics canopy manufacturer Performance Design provides on its website. PD runs a veritable parachute laboratory, and this article puts numbers on the strength loss any visible wear on the lines shows.

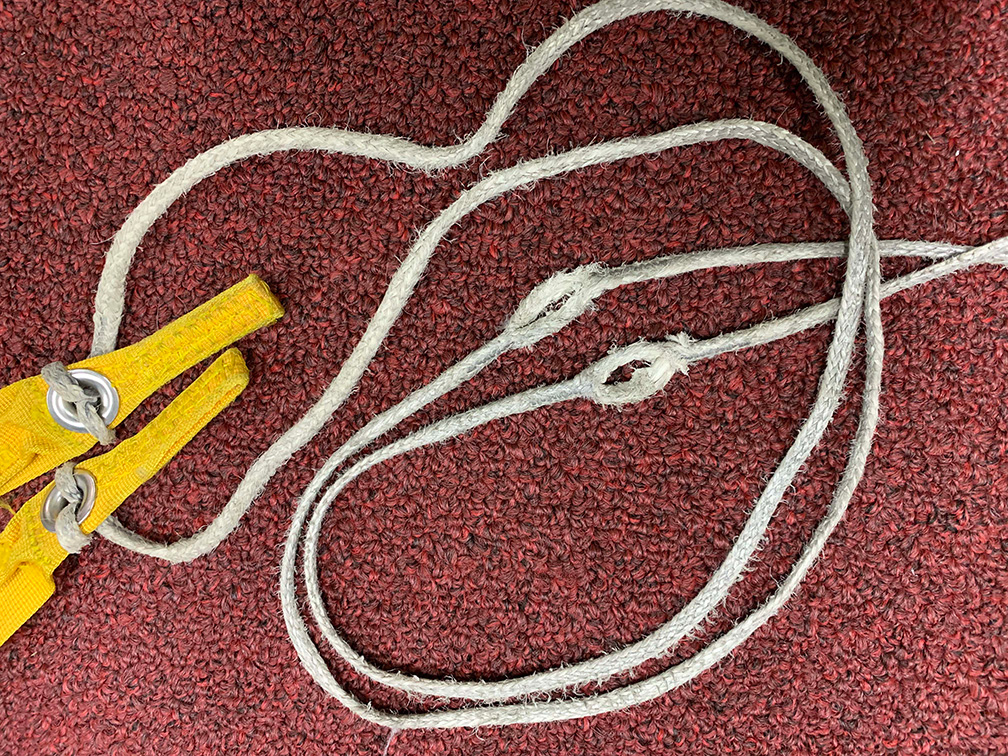
These brake lines are in need of attention before another weekend of skydiving.

Keep an eye on the high-wear area at the kill line inside the D-bag before it comes to this.
You could wait to dig in deeper on Tuesday night—visiting the crossports inside the cells, servicing your 3-ring release system per the manufacturer’s manual, brushing away that now-dried mud from the leg pads and putting down that perfect pack job—but by then you’ll be stuck with anything awry and in a panic to get it taken care of before the next jump.
So start next week’s skydiving this week. Follow the guidance in the PIA doc at pia.com/wp-content/uploads/TS-105.pdf. Insert it into your end-of-weekend ritual just before diving into that cooler!
Kevin Gibson | D-6943 and FAA Designated Parachute Rigger Examiner
Rahlmo’s Rigging at Skydive Orange in Virginia.